IT'S CHRISTMAS EVE! ITS CHRISTMAS EVE! Can you believe it? I'd thought I'd finish off before Christmas with a Secret Santa Post...
One of the most exciting things about Christmas is the surprises and with that in mind and being a keen crafter I signed up to the #craftblogclub 's Secret Santa 2015. This also makes my final craft of my 12 Crafts of Christmas series! (Yes I only did 10 but ssh)
The challenge was to create a handmade gift for one of the fellow #craftblogclub makers. I got the lovely Gill from The Little Soap Kitchen and I chose to make her a Christmas themed banner.
I had lots of fun creating this festive themed banner, this time using red felt and bakers twine to give a Christmassy feel. For a step by step tutorial on how to make your own banner, check out my tutorial here and here for the video.
Now I'm not sure if this is technically cheating but I also added in some scented wax melts. I didn't make them myself but they are however hand made by LubyLu and they smell insane.
Now as any crafter will know, wrapping is also important and I've been loving rustic wrapping this year which you may have seen in my 5 simple Christmas crafts post along with my hand made Christmas cards which revealed to Gill who I was.
I topped the wrapping off by with some yarn and a pom pom because well... why not?
So that was my #craftblogclub Secret Santa 2015. I really hope you you're all having a wonderful Christmas with your friends and family and I'll be back with you on the 29th or 31st to have a round up of 2015.
It's just four days until Christmas, can you believe it!? Where has the month gone?
It also happens to be my birthday today so a double celebration on my part! I've taken the day off to swan around and be a birthday girl.
To celebrate the festive season, I've teamed up with Bon Prix to give you the chance to win the necklace I'm wearing as part of their advent calendar. Each day they are giving away a gift to get you in the festive spirit and today's gift is this necklace which I'm rather obsessed with. I've been adding it to layered outfits like this shirt and jumper combination.
Now, the giveaway is for 24 hours only and the rules are as follows:
Follow @laydey_katabella and @bonprixuk
Using the hashtag #bonprixadvent tweet about the giveaway
The giveaway runs until midnight and I will announce a winner on the 23rd December. GOOD LUCK!
Terms and Conditions
Entrants must be a UK resident.
The winner of each advent day will be chosen by the relevant blogger and contacted directly by that blogger
Only one person per day will be selected as a winner. Only one entry per person/day is allowed. Multiple entries will not be allowed and will be discarded. The chosen winner must have provided the details requested to enter.
There is no cash alternative for any of the prizes given. The prize must be taken as offered.
By entering into this prize competition you are agreeing that bonprix may contact you for marketing purposes.
The judge’s decision is final and no correspondence will be entered into.
We reserve the right to feature photographs, names and locations of the winners in future promotions.
General terms and conditions of shopping at www.bonprix.co.uk apply.
Those involved in the promotion and execution of the competition, employees of the company and their relatives are not eligible for entry.
Entry into the competition is deemed as acceptance of these rules. The promoter is bonprix. bonprix is a trading name of Freemans plc, Registered in England & Wales no. 321643, Registered Office : 66-70 Vicar Lane, Little Germany, Bradford BD992XG. Freemans plc is a part of the Freemans Grattan Holdings group of companies.
The names and counties of the winners will be available from the closing date by writing to: The Secretary, bonprix Prize Competition Department, 66-70 Vicar Lane, Little Germany, Bradford BD992XG, enclosing a S.A.E.
NO PURCHASE IS NECESSARY. This promotion is in no way sponsored, endorsed or administered by, or associated with, Facebook or Twitter. You understand that you are providing your information to bonprix.co.uk and not to Facebook or Twitter. By taking part in this promotion, all participants consent to the Promoter collecting, storing and using their personal data submitted with their entry for the purposes of this promotion. Data will be processed in accordance with the Promoter's privacy policy which is located on the bonprix.co.uk website.
Also a huge thank you and shout out to my good friend Phil who very kindly took these shots for me- isn't he amazing? The shots reminded me of PLL (which I love) hence the title!
I'm so excited about this giveaway and make sure you head over to the Bon Prix blog to see what the last three goodies are you could win in the #bonprixadvent
Merry Christmas lovelies and I'll see you on Thursday for my final blog post before Christmas- eek!!
How is it nearly Christmas already? This month is flying by at such a rate I'm struggling to keep up! I'm also slightly concerned I won't have all 12 of my 12 Crafts if Christmas complete by the time Christmas comes- sob! Please don't be mad with me if this does turn out to be the case!
Anyhow let's get onto craft number 9 that is this super quick and very simple Christmas star bunting...
After putting up the Christmas decorations, I felt the walls were looking a tad bare. This craft is really cheap but looks very effective too.
To make your bunting you will need:
Card
Twine, string or ribbon
Ruler
Pencil
Scissors
Star stencils
Miniature pegs
Hole punch
Drawing pins
Step 1 - Draw around your stencil onto your card then cut out your star.
Step 2 - Place your ruler in the centre of the first point on your star and gently score down the middle using your scissors. Repeat this step until you have scored all of the points on the star.
Step 3 - Fold all your star points, with the score lines facing upwards to create your 3D star.
Step 4 - Repeat steps 1 - 3 until you have enough stars to make your bunting.
Step 5 - Cut a length of twine to hang your stars from- attach with drawing pins.
Step 6 - Peg your stars to the twine, leaving two stars for the ends.
Step 7 - With your last two stars, hole punch at the edge of one point and thread through your twine, knotting at the back of your star.
And voila, you have your very own 3D star bunting!
Did you like that tutorial? Let me know if you decide to do this yourself!
Finally today I'm finishing off with a vlog from surprising my lovely friend Pippa from Clashing Time. After the #cambmeetup myself and Emma wanted to thank her for all the hard work she's put in to the group and without her we wouldn't have met so many amazing people!
Click the video below to watch her being surprised at her thank you party:
So that was todays post and I'll see you on Friday for a Christmas party inspired video!
The final weekend in November was a rather eventful and exciting one for me, firstly attending the Vuelio Blog Awards and then going to the Breaking Bad RV to make cocktails!
Friday 27th marked a very exciting and super glam night for the blogging community as Vuelio held its first Blog Awards ceremony. I was fortunate enough to be invited and took along my fellow blogging hubby Beers Bikes and Bistro, otherwise known as Chris to the awards.
The awards were held at The Brewery on Chiswell Street in London and was a fantastic venue of choice. Hats off to whoever chose it as from the minute you walked in, the staff took your coat and offered you a glass of bubbly. The food was also incredible- looking and tasting amazing!
Mark Dolan hosted the awards, cracking jokes and getting trying to get laughs out of the audience. There was so many categories in the running, some which I didn't even realise people would blog about which made for a very interesting evening. There was a no speeches policy too, making each category quick and exciting to watch. Amongst the nominees we met Al and his wife Jen from The Dad Network who were just brilliant and fellow Cambridge blogger Ana from The Book Smugglers who won the best blog for art and film!
Both Chris and I had such a wonderful time, celebrating the success of other fellow bloggers and partying into the small hours.
On Saturday we nursed our sore heads before another evening of alcoholic beverages but this time in the form of science....bitch.
If you're also Breaking Bad addicts, I'm sure you'll understand just how excited we were to find out that there's an RV where you can go and "cook". I came across this amazing place thanks to Laura blogging about it just a few weeks before. Being part way through season 4 and very much engrossed in the series, Chris and I couldn't resist going along and making some meth cocktails.
Based in Hackney, ABQ run this awesome RV equipped with everything you'd need to create your own crystal cocktails. With names like "Say my name" for cocktails and with the alcohol measures being far from stingy, we knew we were onto a winner, working in teams to create the best cocktails.
The attention to detail from the series was really well mimicked on the RV, making you feel like you're really there! From music from the show to items you'd recognise from each series, everything was perfect.
The cocktails also tasted amazing and were so much fun to make. You made a total of two cocktails whilst on the two hour experience which doesn't sound a great deal however they were strong and in large portions, so much so I was struggling to get my down range before the session ended!
Both Chris and I are seriously regretting not buying a bear. Sob!
If you're interested in cooking your own cocktails on the RV, head to abq.london to sign up. They are soon to be setting up a permanent location in the new year which is very exciting!
So all in all we had a pretty amazing weekend in London from swanky award ceremonies, to cooking cocktails- it was definitely one of my favourite weekends this year!
I also vlogged the weekend too which will give you a better idea of how the awards and cooking went:
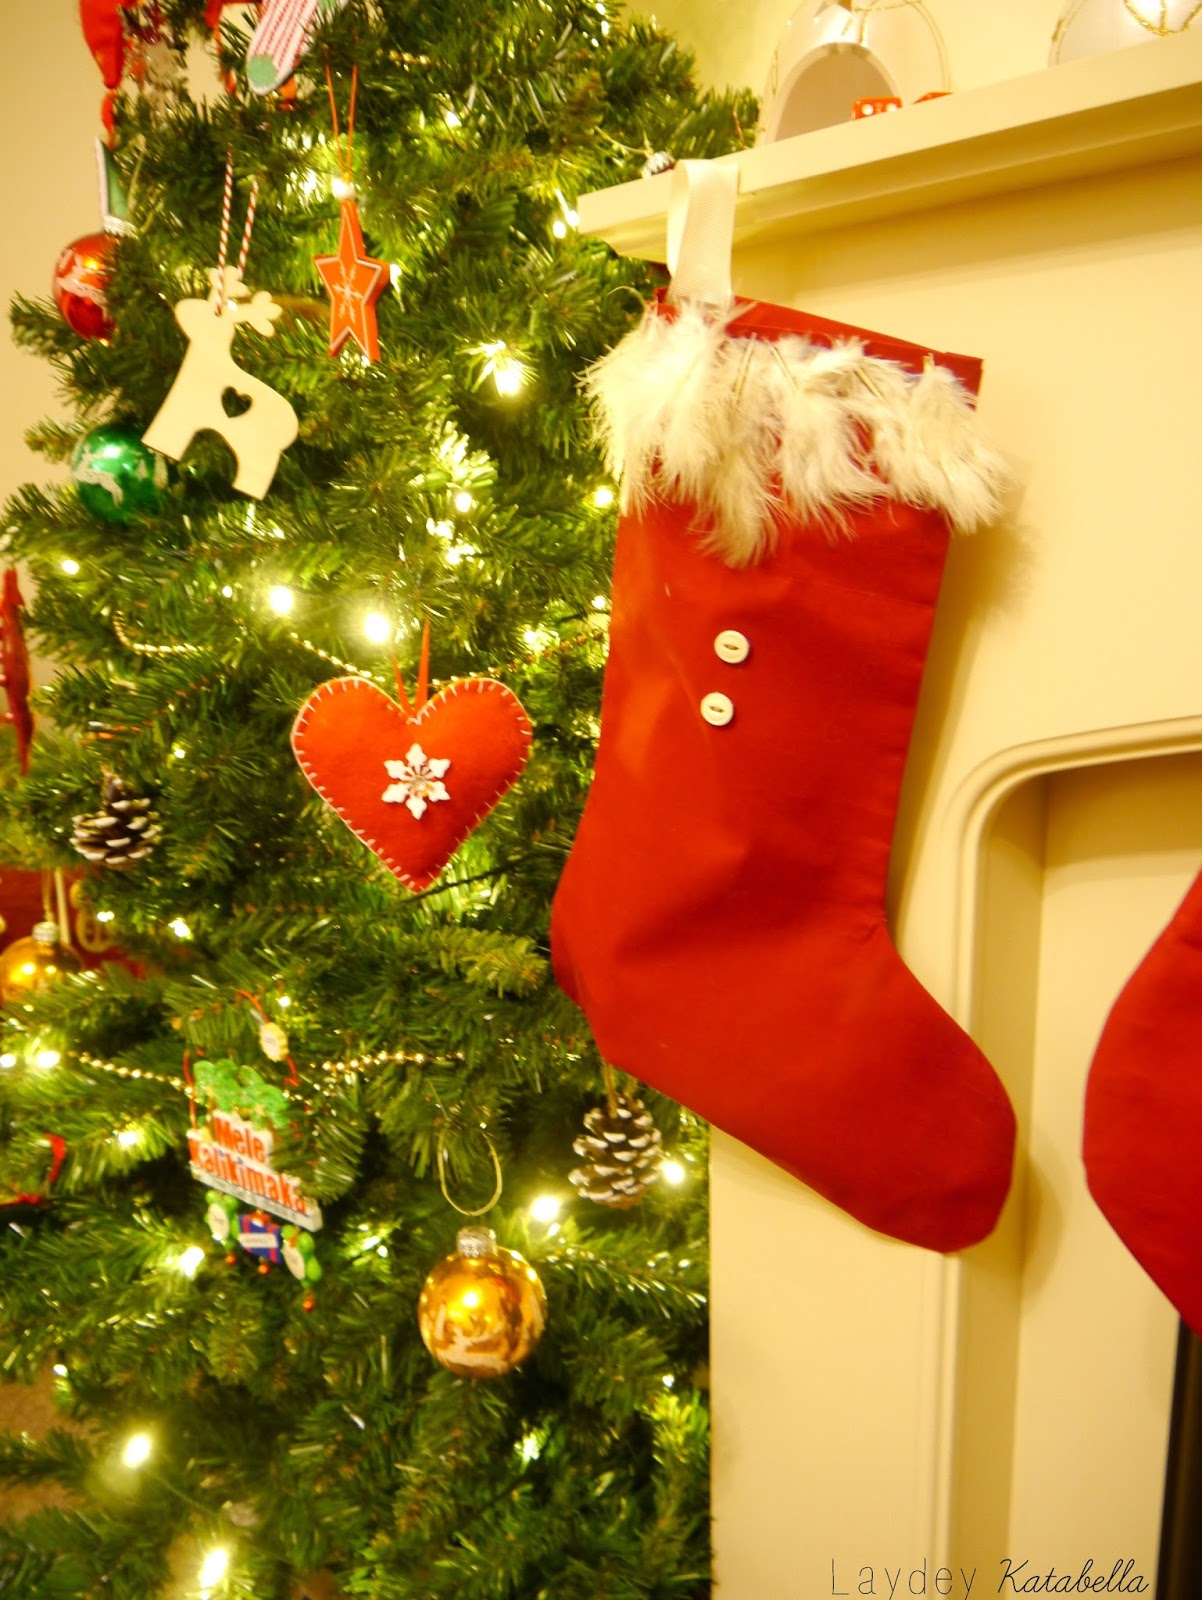
So how is your Christmas shopping going everyone? I'm all finished and even wrapped everything apart from the present due to go in Christmas stockings, so with that in mind, I thought I'd show you just how easy it is to make your very own Christmas stockings!
To begin with, you will need:
Fabric of your choice
Ribbon (for a hanging loop)
Scissors
Sewing machine
Pins and thread
Iron
Embellishment of your choice
Stocking template
Card
Step 1: Create a stocking template on card (I found a template on google) and draw twice onto your fabric before cutting out.
Step 2: Iron your cut out stockings and press your raw edges on the top of the stocking.
Step 3: With your front and back pieces facing one another, stitch a ½” seam down the side, heel, toes and back up again.
Step 4: Turn the stocking right side out and ease out the heel and the toe areas.
Step 5: Fold your ribbon in half and stitch in place at the top of you stocking.
Step 6: Next press your stocking one more before adding embellishments. I went for feathers and buttons for a simple rustic look and attached them with a hot glue gun.
Step 7: Finally hang your stocking and it's ready to fill!
Stockings really are super easy and a great way to add handmade into your festive home. As you can see I made four- one for me, one for Chris and one each for the pets... Yup! I'm that person!
So that's my 8th craft out of my 12 Crafts of Christmas. I hope you enjoyed!
How are you decorating your home made stockings this year?
Happy 4th of December everyone! Now that we're officially in the month of Christmas, I thought I'd share a whole load of Christmas crafts with you which you may be pleased to know are all simple and very much user-friendly! I'm carrying on my 12 Crafts of Christmas theme so by the end of this post I'll have shared 7 crafts with you. So without further ado, onto crafts number 3 and 4 which come in the form of craft kits.
We don't always have a vast amount of materials to hand or perhaps we need a bit of guidance when it comes to trying something new which is why craft kits are brilliant.
Craft no 3- Felted Robin Kit
I picked up this cute felting kit from Kirstie Allsopp's Handmade Fair back in September and couldn't wait to give it a try. It comes with everything you need to create this cute Christmas robin, plus there's enough felt left over that you could easily make another one. As a newbie to felting, I was keen to give it a try and found poking and manipulating the felt into a robin-esque shape somewhat therapeutic!
I still feel I could do with a bit a lot more practice as mine doesn't look quite like Kirstie's but I like to think he has a bit of character and will be nestled in the branches of our Christmas tree this year.
Craft no 4- The Retro felted Bauble
Craft number 4 I also picked up at The Handmade fair and is another simple but effective Christmas craft from Mollie Makes magazine and is a great design for any retro lover.
Again the kit comes with everything you need from the felt to the embellishment and is a great introduction into felt crafting- again something I've never tried before! It's also a great way to incorporate your love for handmade into your Christmas décor. There are so many kits on the market, some as little as £1 (like this one) and make for a fun crafternoon with friends and family. I also love this one and at £2 you can't really go wrong!
Now felting and craft kits aside, lets get onto the final 3 simple Christmas crafts.
Craft No 5- DIY Noel
Another quick and easy craft is to simply paint some letters for Christmas. I picked up these MDF letters in Hobbycraft along with some red acrylic paint and set to work painting them red. The acrylic paint dries really quickly and after two coats I was done! You could easily get more creative and add a design or even decoupage the letters- whatever your creativity desires. I opted for plain red letters as there's A LOT going on in our living room this Christmas. Watch this space...
Craft No 6- Super simple Christmas cards
Card making can be quite time consuming so to save yourself some hassle and look like you've gone to a lot of trouble- invest in a stamp.
I picked up this amazing hand carved wooden stamp at The Handmade Christmas Fair in Manchester and instantly fell in love. It was so intricate and beautiful I just had to have it. At £15 it was a little pricey but I knew it would be an investment in my craft kit.
I tried both stamp ink and paint with the stamp, each giving a different type of effect and decided to go with paint as it gives a crisper and clearer image.
Team it with a bit of added sparkle and glitter and you've got yourself a Christmas card! They take minutes to make and your loved ones will, well... love them!
Craft No7- Pine cone baubles
These pine cone Christmas tree decorations are by far the easiest to do and are also a quick make which is perfect for a mid-week make.
You will need:
Pine cones
Twine
Nail polish
Hot glue gun
Step 1- apply nail polish to the edges of the pine cone. You can use paint if you wish but nail polish is quick drying and something every female has around their house!
Once you have painted each edge they should look something like this...
Step 2- Cut a piece of twine to your desired length to create the hanging loop.
Step 3- Apply hot glue to the end of your twine ends before applying to the pine cone.
Step 4- Hold the twine in place until the glue has set.
And voilà! There you have a super quick and easy DIY christmas decoration!
I also did a step by step video tutorial below:
So those are my 5 simple Christmas crafts! I hope you enjoyed them all and and found them useful.
Which one is your favourite and will you be making and yourself this Christmas?