top

1 2 3 4 1 3 2 4 5
Showing posts with label DIY. Show all posts

Monday, 15 June 2020

DIY Rustic Scaffold Shelves


This post is one I almost didn't write because it seems almost self explanatory but after recieving comments from family and friends saying "I thought you'd bought them" and "how did you do it", I decided it might be blog post worthy!


Scaffolding shelves and rustic shelving have become a huge trend in recent times and you can buy some amazing pieces but they come with a hefty price tag so Chris and I decided to give it a go oursevles!

Chris picked up these unwanted scaffolding planks for free which were a bit grubby and with cement remnants on them. He then set about chipping off the cement and cleaning them up before having them cut to size.


Our neighbour very kindly offered to cut them for us and being an ex carpenter, he cut them beautifully with his tools. Of course you can do this yourself and we would have done otherwise but as he had all the kit and was keen to do it for us, we jumped at the chance! Length wise we opted for a size that would best fit the space we wanted the shelves to go- another benefit of making them yourself. The depth of the shelves was determined a) by the space and b) the brackets I chose. I opted for these beautiful hand made steel brackets from eBay which were 6 inches.


Next Chris sanded down and smoothed off the wood before staining it. We chose this dark oak colour from Colron which colours and protects the wood in one and ended up only applying one coat to get the desired colour and effect we wanted.


Chris then attached the brackets to the shelves. Again we initially decided where to place the brackets by eye which worked out roughly 5 inches from the edge of the shelf and then he measured this for the following two shelves to ensure they would all match.


Finally Chris hung them on the wall and I style and titivated them! This DIY was basically done by Chris and with the help of our neighbour and I'm so pleased with how they turned out. My contribution was choosing the brackets, stain and styling after!


I'd really recommend giving this DIY a go! The shelves are so simple to make but really add to a space. In total it cost us £46 to make these, £30 on the brackets and £16 for the stain!

Are you into this style of shelving and would you make them yourself?


Monday, 2 December 2019

DIY Christmas Crackers

I can't quite believe it's the festive season once again but here we are and I have a Christmas cracker DIY for you this year! I've been thinking for the past few years that pre-made shop bought Christmas crackers are just a bit...well...crap! The gifts inside are naff- who needs a tiny tiny photo frame or a set of minuscule spanners!? I also find the jokes just offensively rubbish so I took to my craft room and came up with my own!
easy diy christmas crackers


For this DIY you will need:

easy diy christmas crackers

  • Toilet-rolls
  • Crepe paper (or wrapping paper that isn't too strong so you can pull your cracker apart)
  • A decorative pen- I went with a copper one to draw on everyone's names and do a little design.
  • Sellotape
  • Cracker snaps (you’ll find them on Amazon, eBay etc)
  • Scissors
  • Thin card, at least 20cm long
  • Decorative string or ribbon
  • Small but exciting things to put inside the crackers- I went for nail varnishes, flower seeds, beard oils and bath bombs!
  • Paper hats (again from Amazon, eBay etc)
  • Jokes! I found some online and had some lovely people tweet me some original ones too!
  1. Step 1
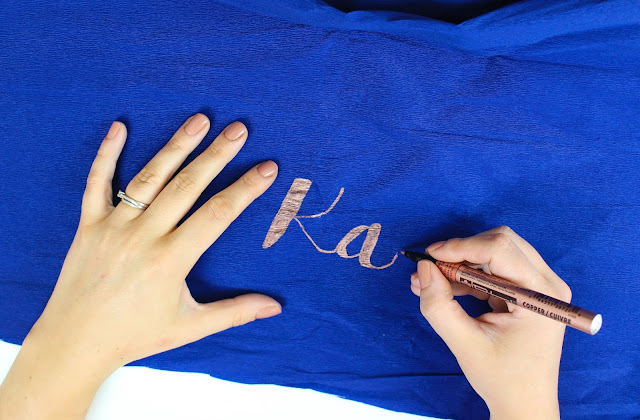
  2. On your crepe paper/ paper of choice, draw out your design and name for your cracker
easy diy christmas crackers

easy diy christmas crackers
  1. Step 2
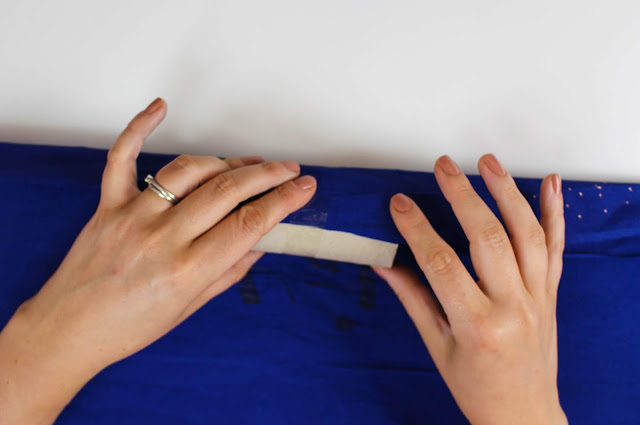
  2. Place a toilet-roll on the long edge of your paper, in the centre, and hold it in place with some sticky tape. Measure the length of crepe paper you need and cut off the excess.
easy diy christmas crackers


  1. Step 3
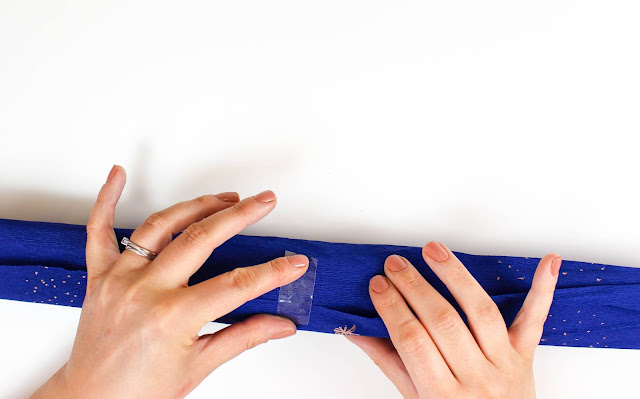
  2. Roll the tube across the paper, then secure with 3 bits of tape along the seam, in the centre and ends.
easy diy christmas crackers
  1. Step 4
  2. Thread a cracker snap through the toilet roll and tape it down to one side of the paper.
easy diy Christmas  Crackers

  1. Step 5
  2. Cut two 20x5cm strips from the thin card. Curl each one into a circle and place one inside each end of the cracker, leaving roughly 2cm sticking out of the end. Hold the card in place with a little sticky tape.
easy diy Christmas  Crackers

  1. Step 6
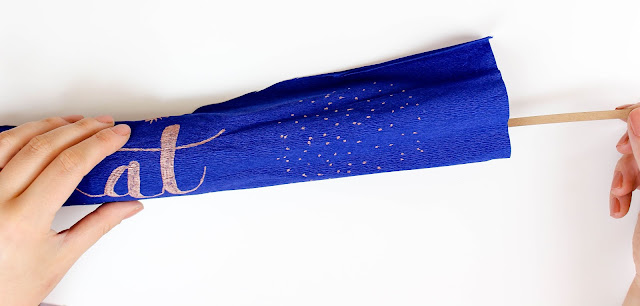
  2. At one end of the cracker, squeeze the crepe paper around the gap between the toilet roll and the card. Gently squeeze and twist a little with your thumb and forefinger, while using your other hand to hold the card in shape. Keep squeezing until the cracker has a nicely defined neck to it. 
easy diy Christmas  Crackers

  1. Step 7
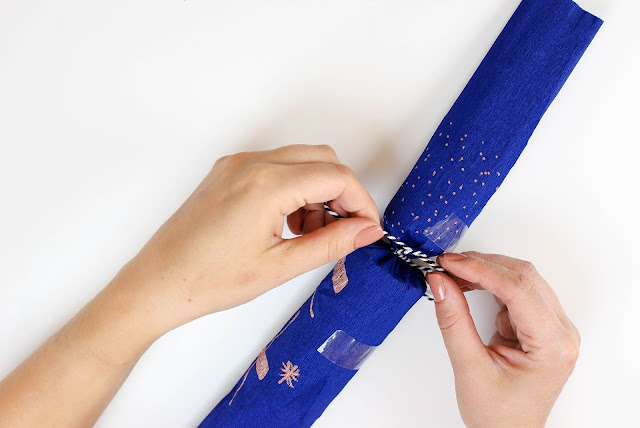
  2. Tie a piece of string or ribbon around the neck of the cracker. Cut off any straggly bits or make a bow.
easy diy Christmas  Crackers
  1. Step 8
  2. Insert your Christmas hat, joke and gift in the open end of the cracker.  Seal the open end as before.
Easy DIY Christmas Crackers

Easy DIY Christmas Crackers

Easy DIY Christmas Crackers
  1. Step 9
  2. Cut off the excess crepe paper from the ends and ta-da! You have just made your own homemade Christmas crackers!
Easy DIY Christmas Crackers

Easy DIY Christmas Crackers

Easy DIY Christmas Crackers

 I am so pleased with how simple and easy these crackers are to make yet they look really effective and are a great to make crackers personal to your guests on Christmas Day!


Will you be trying this DIY out for Christmas and what else are you planning to make home made?

For a step by step video on these crackers, check out the Youtube video below!


Friday, 8 March 2019

DIY Diaries: The Master Bedroom Edit

Aloha! I'm back with another room makeover/ decor post and this time it's the master bedroom!

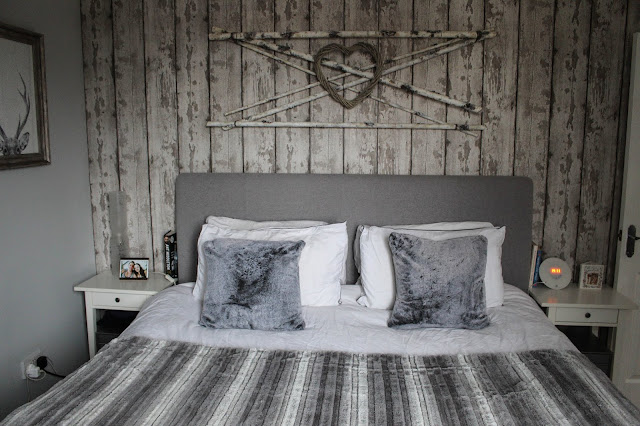
DIY rustic log cabin bedroom

This post has been a long time coming, having finished this room in October 2018, however  I'd been toying with a few bits which I'll explain further on this post. So first, lets discuss the inspiration for this room!

DIY rustic log cabin bedroom


I'd been struggling with knowing how to decorate this room to please two different tastes. I love girly style whereas Chris naturally despises it so we needed a compromise! I also wanted something that's cosy and Chris didn't want anything too fussy so we got to thinking of places we've stayed in the past and liked the aesthetic plus the wonderful world of Pinterest to draw inspiration.


A big inspiration for us was our stays at North Star Club (which you can read about here and here) as it made us feel cosy witht he fux fur soft furnishings and partly connected with nature through the rustic logs and wood of the rooms.

The Moon Suite at North Star Club

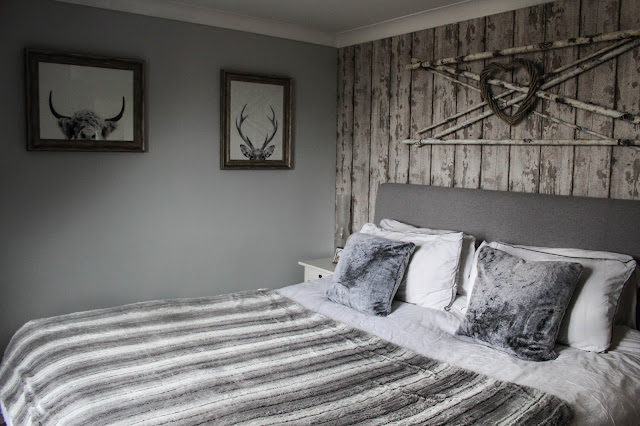
Naturally we'd have loved to had put logs at each corner of the bed for a rustic four poster bed look and cladded the walls but it just wasn't practical so instead we went with rustic wood style wallpaper and these faux silver birch branches which we pick up second hand from someone's no longer needed wedding decor and fashioned together a rustic piece to hang above the bed. The finishing touch was the wicker heart which came from our own wedding decor stock and I think it ties in beautifully.

DIY rustic log cabin bedroom
Super king Bed- Dreams
Throw- The Range
Bedding- Hyde & Sleep
Wicker heart- QD
Faux silver birch- picked up second hand
Wallpaper- Wilkos
Bedside tables- IKEA Hemnes range (but picked up second hand)
Clock- Amazon
Lamp- IKEA (similar here)
Deer Artwork- iamfy
Cow Artwork- iamfy
Frames- The Range

DIY rustic log cabin bedroom

DIY rustic log cabin bedroom


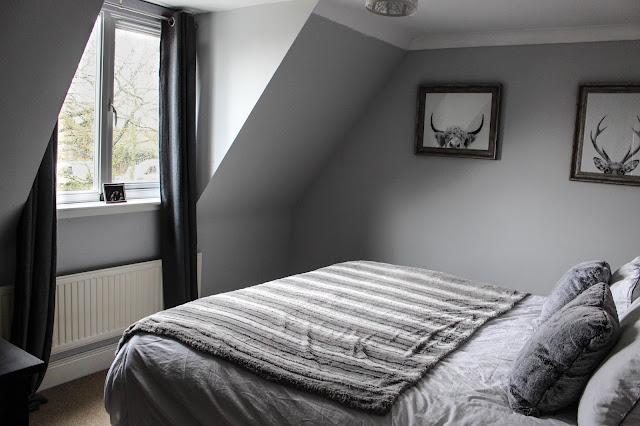
Now you probably don't recognise this room from before but it was in fact my office when we moved in (see here.)

Before!
With the addition of a new bed, we needed a space free from built in wardrobes to fit this monstrous super king bed. You might be thinking we're mad for buy a big that big but honestly we've done the double bed, the king size bed and still I was bed hogging- so much so Chris didn't sleep properly for the first five years of our marriage!So yes we lost some wardrobe space to accommodate this mahoosive bed but the bed is an ottoman, meaning we have plenty of space underneath and with a hydraulic assisted lifting mechanism, it makes lifting up the bed a breeze rather than a ball ache and we can sleep soundly too.

DIY rustic log cabin bedroom

The crisp white bedding was actually thrown in with the bed when we bought it and its actually lovely quality so we just chose to finish the bed off with some cosy cushions and a throw.

DIY rustic log cabin bedroom

Chest of Drawers- IKEA Hemnes range (but picked up second hand)
Lamp- The Range
TV- Old and god knows where from!
Curtains- The Range
Blind- The Range

When it came to furniture, I was actually really pleased with myself for sourcing it all second hand, saving us a hell of a lot of money and giving unwanted furniture a second life. I'd always recommend looking to see if the furniture you like can be sourced second hand or if you can find something similar as you can get a  real bargain and you're helping to upcycle rather than condemning good furniture to landfill. I had been eyeing up the IKEA Hemnes range and picked up both the bed side tables from one person and this huge chest of drawers from another for less than £150!

DIY rustic log cabin bedroom

So I'd been toying with painting the chest of drawers grey but after some careful consideration I decided against it as it might look too matchy matchy plus I quite enjoy this dark cosy corner.

DIY rustic log cabin bedroom

DIY rustic log cabin bedroom

Overall I am really chuffed with how this room turned out! It's definitely become one of my favourite rooms to relax in and the bed teamed with the tranquil, cosy cabin aesthetic means I've never slept better.

Would you go for this in your bedroom?


Related Posts Plugin for WordPress, Blogger...